Creating Your DIY Rain Bottle

-
Collect your materials
This project requires very few tools to create. You'll need a bottle with a cap - preferably one on hinges or, even better, one of the push-pull caps you often find on water bottles or dish detergent. Next, you'll need either scissors, a screwdriver, or another sharp object for creating holes in the bottom of your bottle. -
Clean your bottle
Make sure your bottle is clean and free of residue from the materials it formerly held. We used a honey bottle, so we make sure to wash it thoroughly with warm water to get rid of any lingering stickiness. -
Make holes in the bottom of your bottle
We used scissors, but as mentioned, you can poke with a screwdriver, auger, nails - anything easy to handle and sharp enough to perforate your bottle. Be very careful during that step not to slip and cut yourself!
Using Your Rain Bottle
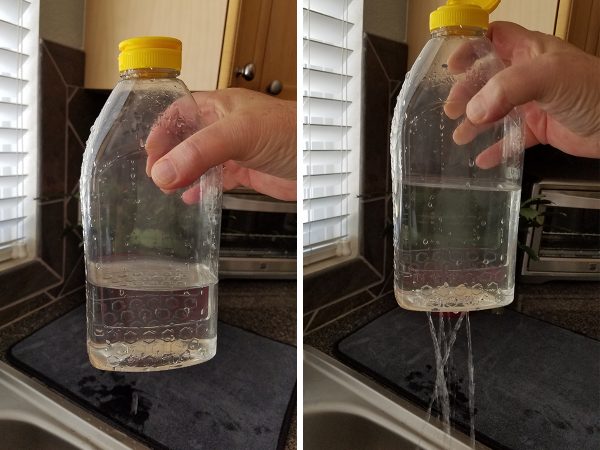
- Fill your bottle by removing the cap, and submerging it in water. Once your bottle is as full as you like, cap it shut before lifting it out of the water. The water should stay in the bottle when removed from the sink, despite the holes in the bottom. If the water spills out, check that your cap has a tight seal.
- Now that your bottle is full and you've trapped water inside, see what happens when you open the lid! Water "rains" out of the bottom as the air pressure from above pushes water downward.
Check out these other fun outdoor STEM classroom materials from Kodo Kids!
 Pump Works
 Outdoor Funnel Stand
 Ice Molds
 Outdoor Balance


Share:
A Priceless Introduction: Interaction vs Engagement in Play
Wormy Wood Investigation